How to Prevent Common Air Conditioning Repair Problems

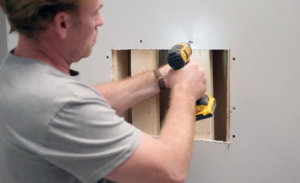
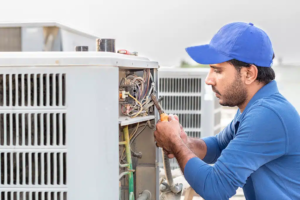
Air conditioning repair is more than just restoring the cooling functionality of an air conditioner. It also ensures that the system can efficiently regulate temperature and humidity.

If your AC makes strange noises like rattling, squeaking, or banging, it’s time to make a maintenance appointment. These sounds indicate various problems, including dirty filters or clogged drain lines. Contact Air Conditioning Repair Orlando now!

If your AC unit is turning on and off in quick succession, you’re experiencing what’s known as short cycling. This issue compromises your comfort, leads to higher energy bills, and can even damage your air conditioner over time. So, what causes it? While you may think the best option is to call a professional immediately, there are some easy fixes that can save you both time and money.

The most common cause of short cycling is a dirty air filter. When the air filter is clogged with dust, it restricts airflow and causes the system to overheat. To prevent this, replace your air filter regularly, ideally every 1-3 months.

Another problem that can lead to short cycling is a frozen or leaking evaporator coil. The evaporator coil removes latent heat from the air, but it can’t do that when it’s iced or dirty. If this is the case, turn off your system and check the evaporator coils for ice. If it is iced, leave your system off until the coils completely defrost.

A malfunctioning thermostat can also cause your air conditioner to short cycle. Over time, thermostats can start to lose accuracy and register the home as warmer than it actually is. This will trigger the air conditioner to run longer than necessary and shut off prematurely, leading to short cycling.

Lastly, a failing compressor motor can also lead to short cycling. The repeated starting and stopping puts additional stress on the compressor, which can lead to early wear and tear and early failure. If the compressor motor is still under warranty, it can be much more cost-effective to simply use your warranty to have it replaced by a new unit.

If you’re experiencing any of these issues, or any other problem with your air conditioning, don’t hesitate to contact a reputable professional right away. An experienced HVAC technician will be able to diagnose the problem and provide the necessary solution. They can inspect your system, determine whether you need a smaller unit, more refrigerant, or repairs to the wiring and power source.

Unpleasant odors

The smell of musty, mildew-like funk is an unmistakable sign that moisture has started to accumulate where it shouldn’t — and is now being blown into your home. Mold and mildew thrive in warm, damp environments such as those around condensation on evaporator coils and drain lines. When these microbes get blown into your ductwork (in the case of ducted AC systems) or into your living spaces, they produce signature musty odors that are instantly noticeable every time you turn on your air conditioning system.

Odors that smell like burning rubber or rotten eggs are also a serious problem that warrants immediate attention. They typically indicate that there’s a dead animal stuck somewhere in the air conditioner or ductwork. If you notice these odors, shut off your HVAC system immediately and contact a local pest control company to investigate and address the issue.

Another odor that demands immediate attention is one that smells like exhaust fumes. This can be an indication that there’s a refrigerant leak in the system. Inhaled refrigerant is toxic, so don’t delay getting the problem addressed by a licensed technician.

Keeping an eye out for unpleasant odors from your air conditioning system can help you prevent expensive repair bills later. For most odor sources, basic troubleshooting steps can resolve the problem entirely. However, serious problems such as electrical burnouts or significant leaks will almost always require a professional diagnosis and AC repair. The longer these issues go untreated, the more they’ll deteriorate your air quality and lead to costly repairs or replacements in the future. So don’t let foul odors undermine your summer comfort; call the professionals at Berico today to discuss your needs and schedule an appointment to address the problem!

Ice buildup

Whether you own a central air conditioner, ductless mini-split system or window-mounted unit, finding your AC covered in frost or ice is never good news. In addition to reducing cooling efficiency, ice build-up indicates that heat exchange in the system isn’t occurring properly and can lead to costly repair bills down the road.

Fortunately, there are several ways to prevent ice build-up in your AC, starting with regular maintenance visits. A certified HVAC technician will check the system and ensure refrigerant levels are optimal, preventing the evaporator coil from freezing over. They’ll also make sure all air vents and registers are open and unobstructed, ensuring proper airflow and avoiding any potential blockages that could trigger the ice-forming process.

Ice formation is typically a sign of problems with your air conditioner’s heat transfer process, either due to restricted airflow or low refrigerant. Restricted airflow keeps warm air from passing over the evaporator coil efficiently, while low refrigerant reduces the coil’s ability to absorb heat, which can cause it to freeze. If left unchecked, ice build-up can even damage the compressor and other parts of the unit.

If you notice ice forming on your air conditioner, the first thing you should do is turn off the system and let it thaw. Don’t attempt to scrape the ice or chisel it away, as this will only increase the likelihood of damaging your unit and may not actually solve the underlying problem. Instead, use a heat gun or hair dryer set on the highest setting to speed up the thawing process.

The best way to prevent ice build-up in your air conditioning is to have a professional clean the evaporator and condenser coils. These should be done at least every two years, as the dirt and debris that accumulates on the coil can inhibit proper heat transfer and eventually lead to the ice-forming process. Having the coils cleaned regularly by an experienced HVAC technician will help you avoid the need for expensive repair services down the line. Also, remember to change your air filter on a regular basis and keep it clean to improve airflow and prevent blockages.

Dirty filters

One of the most common reasons for air conditioning repair is a dirty filter. Dirty filters prevent the system from performing effectively and can cause a variety of symptoms. Luckily, this problem is easy to prevent with a little diligence and regular maintenance.

A clean filter is important because it traps allergens and other harmful particles. As these particles are filtered, they are prevented from entering the ductwork and recirculating throughout your home. This can be extremely problematic for people with allergies or respiratory problems. Dirty filters also reduce efficiency and lead to increased energy bills.

While the majority of homeowners know that air filters need to be changed regularly, some may forget to do so or ignore the warning signs. Dirty air filters can cause serious damage to your HVAC system and lead to costly air conditioning repairs. However, the problem is easily preventable by ensuring you change your filter and schedule routine maintenance with a professional.

When an air filter becomes too dirty, the dirt and particles become entangled in the evaporator coils and blower fan. This clogs the coil and prevents proper air flow. As a result, the compressor must work harder to cool your home and your energy bill increases. In addition, a dirty air filter can cause the evaporator coils to freeze, which is not only expensive but can be dangerous.

Changing your filter regularly can improve indoor air quality, reduce energy costs, and extend your HVAC system lifespan. Changing the filter can be done at home by removing the old filter, inspecting it for visible debris, and cleaning or replacing it as needed. A reminder can be set to ensure you always remember to check and replace your filter.

The most common sign of a dirty air filter is a visible accumulation of dust around the vents. This can be an indicator that the filter is no longer able to trap allergens and other particles. Other symptoms of a dirty filter include a noticeable reduction in airflow and uneven heating or cooling throughout the house. These symptoms indicate that the air filter is clogged and needs to be replaced.

Drywall Repair – How to Get Rid of Cracks in Your Home’s Drywall in an Afternoon

Drywall Repair Naperville IL can be a tricky project. Hiring a professional is the best option to ensure a quality job and a paint-matching result.

Minor blemishes like dents, dings, or small nails and screw holes can be repaired with spackle. This simple repair requires a little patience but can be accomplished easily.

The drywall in your home expands and contracts as the seasons change, which causes it to shift and crack. These cracks are normally small and shouldn’t be a cause for concern unless they reappear or get wider. A professional should address cracks wider than 1/8 inch. Cracks that occur along with sagging drywall may indicate structural damage.

When drywall meets in corner, there is an L-shaped metal strip called a corner bead that helps prevent the drywall from cracking. However, these metal strips are not indestructible and can become dented by the vacuum cleaner, a child flinging a toy, or by moving furniture. These dents can be repaired by scraping away the loose debris and applying a thin coat of joint compound. Then sand the repair and feather out the edges so it blends into the rest of the wall.

Before you apply any drywall patch or spackle:

  1. Make sure the area around the crack is clean of dust, cobwebs, and debris.
  2. Use a putty knife to apply the first thin coat of joint compound.
  3. Once it dries, sand the surface smooth using coarse drywall sandpaper, then apply a second coat of compound and sand again.

The final step is to prime the spot.

Drywall patch and spackle can hide most minor holes and cracks, but they are not indestructible. If you have large, jagged cracks, or if they are accompanied by other signs of water damage such as discoloration, mold, or a musty odor you may need to call a professional.

When repairing cracks, you should always use a quality drywall compound. This is usually available in premixed buckets and comes in four different varieties, ranging from thick heavyweight to lightweight all-purpose. You should also consider wearing a respirator mask during the repair process to avoid inhaling the fine dust created when sanding. Inhaling gypsum dust can dehydrate the skin and cause respiratory problems. The best drywall compounds are high-strength or self-priming, but any type of mud will work in a pinch. For very deep dents, it is sometimes necessary to build up the repair with several layers of compound.

Water Damage

Water damage in drywall is a major problem and should be addressed as soon as possible. If left untreated, it can cause rot, mold growth, and other serious structural issues in your home. It is also a breeding ground for bacteria.

The first step to repairing water damaged drywall is finding the source of the leak and fixing it. This is the most important part of any drywall repair job. Once the underlying issue is resolved, the water damage will no longer be an issue.

If you’re unsure whether your drywall has water damage, it is recommended that you use a moisture meter to determine the moisture content of the wall. The meter will measure the level of moisture in the wall and give you an indication of how long the drywall has been exposed to water.

Once you’ve determined that your drywall is in need of repairs, the first step is removing any items that are on or near the affected wall. This includes pictures, mirrors, molding and baseboards. You’ll also want to remove any wallpaper that is on the wall. You can purchase a wallpaper removal solution at your local hardware store that will dissolve the wallpaper adhesive and allow it to be removed easily.

Next, you’ll need to assess the extent of the damage. If your drywall is completely saturated, it will need to be replaced. However, if the drywall is only slightly sagging or damp, you may be able to save it by cutting out the saturated section of the wall and applying a new patch. Once the damaged section of drywall is removed, it is recommended that you use fiberglass joint tape to cover the seams. This will prevent the drywall from becoming damaged again in the future.

If you suspect that you have a serious leak or if the drywall in your home is already showing signs of water damage, it’s recommended that you call your local PuroClean office for professional assistance. Our technicians will utilize specialized equipment, such as air movers, dehumidifiers and moisture meters, to dry the affected drywall and surrounding areas as quickly as possible. They will also address the cause of the water damage to ensure that it doesn’t happen again in the future.

Nail Holes

A landlord’s worst nightmare is a wall covered with nail holes left behind by tenants who used to hang family photos, decorative mirrors and abstract artwork. These unsightly holes aren’t uncommon and can be a turnoff to potential renters. However, luckily, they’re also not difficult to repair. Nail and anchor holes can be easily patched with spackle or drywall compound. If you follow the expert steps from this drywall repair blog, you’ll be able to hide these small marks in an afternoon.

The first step is to clean the area. Use a damp cloth or sponge to wipe away any dust and dirt on the surface of the drywall. If you notice any cracks or other damage, these will need to be repaired before continuing.

Next, prepare the area for spackling. Remove any remaining nails or anchors from the wall and if there are no signs of water damage, then you can proceed to sand down the surface of the drywall around each hole. This will help smooth the area and make it blend in with the rest of the wall.

You’ll want to purchase a tub of spackling paste or filler from your local hardware store. Choose a product that’s formulated for the surface you’re working with. Basic wood filler works if you plan on painting the patch, but for surfaces that will be stained or used in a construction project, look for something that’s specifically formulated for those purposes. A small putty knife is also essential for this drywall repair job. You can find a drywall specific putty knife at your hardware store, but it’s also possible to use a flexible plastic credit card type tool such as a retired Blockbuster video rental card.

Once the spackling has dried, sand the patch with a fine grit sandpaper or a sanding sponge. This will ensure that the bump in the wall is smooth and that it blends in with the rest of the drywall.

Once you’re satisfied that the spackled area looks smooth, it’s time to paint. Remember to choose a color that will be compatible with the rest of your walls. If the drywall is already white, then you’ll be able to get away with using just one coat of paint.

Spackle

Spackle can be used to fill minor cracks, nail holes and other blemishes on your drywall. It’s typically more elastic than joint compound and won’t shrink as much, which means you can use less in a single application. It is also less likely to leave unsightly marks behind if applied properly. It can be sanded down to an almost-perfect finish, unlike some other wall repair products that may leave a noticeable mark behind.

You can purchase ready-made spackle or make your own in a dry mix form. These powders are usually made of plaster of Paris, limestone, attapulgite, perlite and calcium sulphate dehydrate, and they contain low to no VOCs. They are easy to work with, even for beginners with minimal home improvement experience, and they require fewer steps than plaster to set up. However, they can be dusty, and some chemically sensitive people might want to consider using a different product that doesn’t contain crystalline silica.

Once the spackle dries, you can sand it with a block sander or fine-grit sandpaper to smooth down the surface and create an even appearance with the rest of your wall. It’s then time to prime and paint the repaired area to match the color of your existing wall. If you’re covering up a large area, repainting the whole wall might be necessary to hide any patched spots that stand out.

Depending on how much damage your drywall has sustained, you may need to call in a professional for help with the repair. The professionals can provide the proper materials and techniques for your specific situation, helping you get back a sturdy wall that is ready to be painted.

While you can do a few minor repairs on your own, it’s often better to leave the more significant problems for a pro to fix for you. If you have any questions or concerns about the condition of your drywall, contact us here to be matched with top-rated pros near you. It’s fast, free and easy! Enter your zip code to get started.